> This page is for 플랫폼, version 레거시.
> For other versions, use one of these documentation indexes:
> - V4 (default): https://next.developer.frame.io/platform/v4/llms.txt
> - V4 실험적: https://next.developer.frame.io/platform/v4-experimental/llms.txt
> - 레거시: https://next.developer.frame.io/platform/v2/llms.txt
> For clean Markdown of any page, append .md to the page URL.
> For a complete documentation index, see https://next.developer.frame.io/llms.txt.
> For AI client integration (Claude Code, Cursor, etc.), connect to the MCP server at https://next.developer.frame.io/_mcp/server.
# Zapier에 사용자 지정 작업 배포
**[개요 페이지](/docs/custom-actions)**에서 기능에 대해 알아보세요.
미디어 워크플로의 일부로 YouTube나 Wistia와 같은 게시 채널, 또는 Google Drive나 Amazon S3 아카이브와 같은 스토리지 대상으로 Frame.io 미디어를 전송해야 할 수 있습니다.
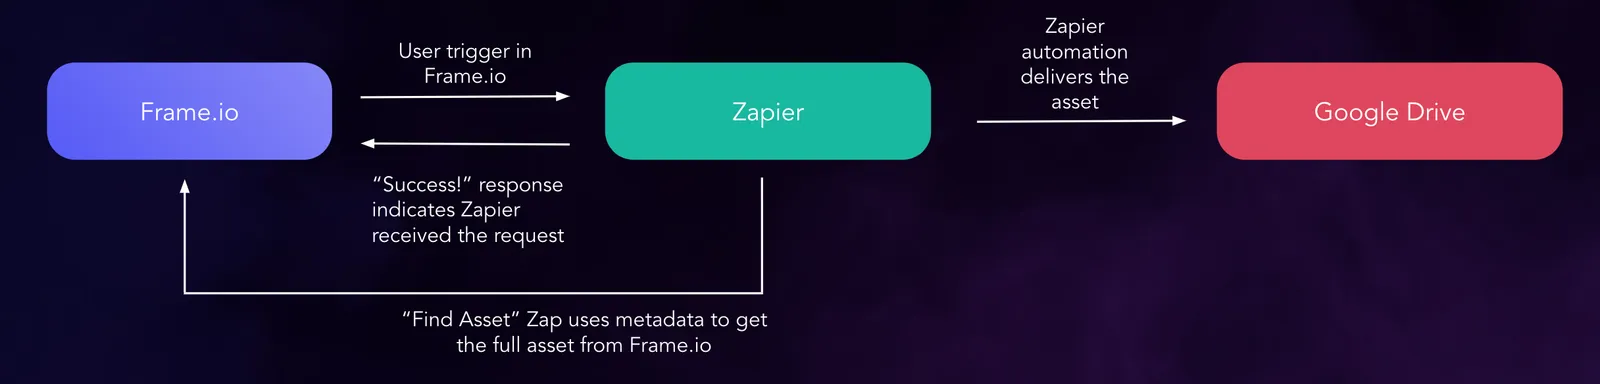
Zapier 트리거를 사용하여 워크플로를 자동화할 수도 있지만, 사용자 지정 작업을 사용하면 Frame.io 내에 메뉴 옵션을 만들어 외부 위치로 미디어를 간소화하여 전송할 수 있는 추가적인 제어 수준을 제공할 수 있습니다. 또한 사용자 지정 작업은 온디맨드 웹훅일 뿐이므로, 이를 사용자 지정 트리거로 Zapier에 연결할 수 있습니다. 한 번만 설정하면 팀 멤버와 공동 작업자가 Frame.io 내에서 자동화에 액세스할 수 있습니다.
**이 가이드에서는 Frame.io 사용자 지정 작업을 Zapier에 연결하고 서드파티 앱이나 서비스에 미디어를 전송하는 방법을 설명합니다.****참고:** 웹훅은 Zapier의 프리미엄 기능입니다. 최소한의 비용으로 사용자 지정 작업을 배포하려면 [자체 서버리스 함수](https://github.com/Frameio/custom-actions-example-app/tree/master/examples/custom-action-offload-to-s3)를 작성하는 것을 고려해 보세요.
## 아키텍처
 ## Zapier 설정 및 사용자 지정 작업 만들기
Zapier에서 새 Zap을 만드세요. 초기 트리거로 [Zap - Webhooks by Zapier](https://zapier.com/apps/webhook/integrations)를 선택하세요. Action을 "Catch Hook"으로 설정하세요. 이 경우 별도의 사용자 지정이 필요하지 않으므로 다음 단계로 넘어가세요.
## Zapier 설정 및 사용자 지정 작업 만들기
Zapier에서 새 Zap을 만드세요. 초기 트리거로 [Zap - Webhooks by Zapier](https://zapier.com/apps/webhook/integrations)를 선택하세요. Action을 "Catch Hook"으로 설정하세요. 이 경우 별도의 사용자 지정이 필요하지 않으므로 다음 단계로 넘어가세요.  ### 작업 테스트
잠시 시간을 내어 Frame.io에서 사용자 지정 작업을 테스트해 보세요. 해당 작업이 Zapier에 캡처되는 요청을 생성하는지 확인하세요.
### 작업 테스트
잠시 시간을 내어 Frame.io에서 사용자 지정 작업을 테스트해 보세요. 해당 작업이 Zapier에 캡처되는 요청을 생성하는지 확인하세요.
 저희 개발자 사이트의 [로그](https://developer.frame.io/actions)를 사용하여 사용자 지정 작업 페이로드를 살펴보세요
### Zapier에 'Find Asset' 단계 추가
사용자 지정 작업 페이로드는 단순히 에셋을 참조할 뿐이며, 파일 자체를 포함하지는 않습니다. Zapier에 파일을 가져올 위치를 알려주는 추가 단계가 필요합니다. Zap에 'search' 트리거를 추가하세요 - [Frame.io - Find Asset](https://zapier.com/apps/frameio/integrations#css-d28kn1-Button__buttonText)
Find Asset 설정의 실제 적용 모습은 다음과 같습니다.
저희 개발자 사이트의 [로그](https://developer.frame.io/actions)를 사용하여 사용자 지정 작업 페이로드를 살펴보세요
### Zapier에 'Find Asset' 단계 추가
사용자 지정 작업 페이로드는 단순히 에셋을 참조할 뿐이며, 파일 자체를 포함하지는 않습니다. Zapier에 파일을 가져올 위치를 알려주는 추가 단계가 필요합니다. Zap에 'search' 트리거를 추가하세요 - [Frame.io - Find Asset](https://zapier.com/apps/frameio/integrations#css-d28kn1-Button__buttonText)
Find Asset 설정의 실제 적용 모습은 다음과 같습니다.
 이제 이름, 원본 파일, Frame.io가 파일에서 실행한 각 [트랜스코드](https://support.frame.io/en/articles/13321-what-is-my-video-converted-to-when-it-s-uploaded)를 포함하여 에셋에 대한 더 많은 정보를 Zapier에 전달하게 됩니다.
### 대상을 향해 에셋 전송
데모 목적으로 파일을 Google Drive로 전송해 보겠습니다.
이제 이름, 원본 파일, Frame.io가 파일에서 실행한 각 [트랜스코드](https://support.frame.io/en/articles/13321-what-is-my-video-converted-to-when-it-s-uploaded)를 포함하여 에셋에 대한 더 많은 정보를 Zapier에 전달하게 됩니다.
### 대상을 향해 에셋 전송
데모 목적으로 파일을 Google Drive로 전송해 보겠습니다.
 ## 다음 단계
Zapier는 작업을 배포하는 가장 쉬운 방법일 수 있지만, 몇 가지 제한 사항이 있습니다. 주로, 사용자 지정 작업이 지원하는 [완전한 요청-응답 패턴](https://docs.frame.io/docs/custom-actions#create-a-form-callback)으로 사용자와 통신할 수 없다는 점입니다. 사용자는 기본 "Success!" 메시지만 받게 됩니다 -- 즉 Zapier가 웹훅을 처리하고 Zap에서 일련의 작업을 트리거했음을 의미합니다.
## 다음 단계
Zapier는 작업을 배포하는 가장 쉬운 방법일 수 있지만, 몇 가지 제한 사항이 있습니다. 주로, 사용자 지정 작업이 지원하는 [완전한 요청-응답 패턴](https://docs.frame.io/docs/custom-actions#create-a-form-callback)으로 사용자와 통신할 수 없다는 점입니다. 사용자는 기본 "Success!" 메시지만 받게 됩니다 -- 즉 Zapier가 웹훅을 처리하고 Zap에서 일련의 작업을 트리거했음을 의미합니다. 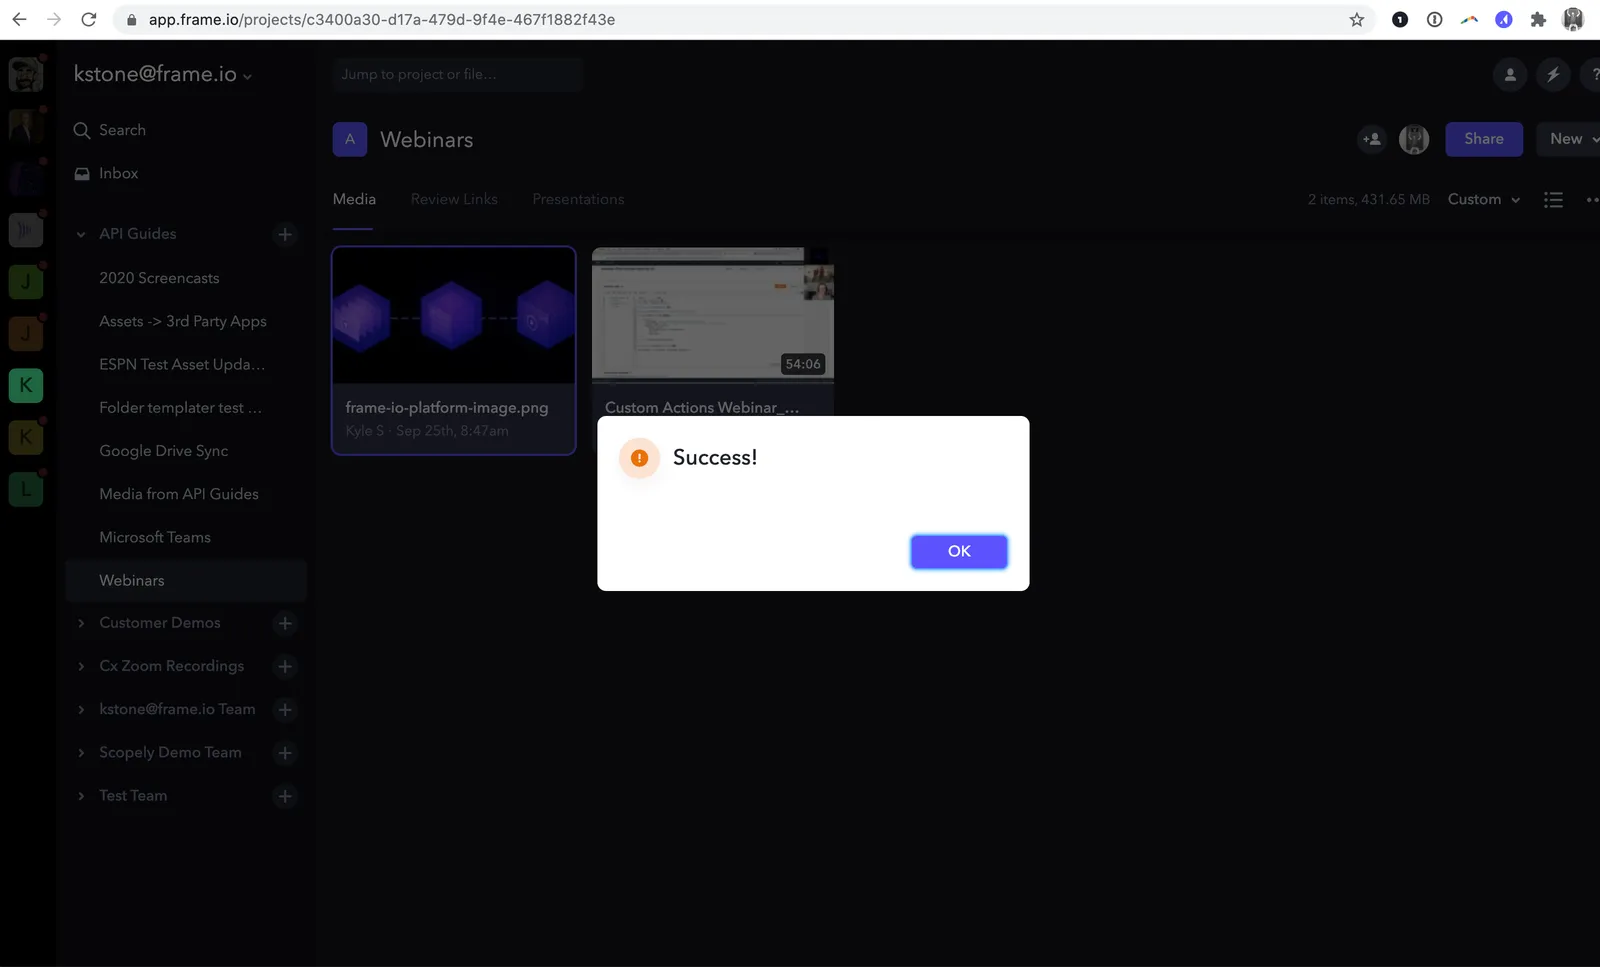 이는 오해의 소지가 있을 수 있습니다. "Success!" 메시지는 단순히 성공적인 핸드오프를 나타내며, Zapier 워크플로 자체에서 문제가 발생하더라도 표시되기 때문입니다. Zapier 자체의 문제 해결에 대한 자세한 내용은 [작업 기록 탐색](https://zapier.com/learn/getting-started-guide/task-history/)에 대한 가이드를 확인하세요.
### 자체 앱 구축하기
[소규모 서버 앱](https://github.com/Frameio/custom-actions-app-python)을 작성하거나 [Lambda 함수](https://github.com/Frameio/custom-actions-example-app/tree/master/examples/custom-action-offload-to-s3)를 사용하면 사용자 입력을 처리하고 여러 코드 경로를 생성할 수 있으므로, 여러 대상으로 파일을 전송, 파일 유형을 다르게 처리, 또는 워크플로 자동화에서 Frame.io 사용자에 대한 정보를 활용하는 유용한 방법입니다.
이는 오해의 소지가 있을 수 있습니다. "Success!" 메시지는 단순히 성공적인 핸드오프를 나타내며, Zapier 워크플로 자체에서 문제가 발생하더라도 표시되기 때문입니다. Zapier 자체의 문제 해결에 대한 자세한 내용은 [작업 기록 탐색](https://zapier.com/learn/getting-started-guide/task-history/)에 대한 가이드를 확인하세요.
### 자체 앱 구축하기
[소규모 서버 앱](https://github.com/Frameio/custom-actions-app-python)을 작성하거나 [Lambda 함수](https://github.com/Frameio/custom-actions-example-app/tree/master/examples/custom-action-offload-to-s3)를 사용하면 사용자 입력을 처리하고 여러 코드 경로를 생성할 수 있으므로, 여러 대상으로 파일을 전송, 파일 유형을 다르게 처리, 또는 워크플로 자동화에서 Frame.io 사용자에 대한 정보를 활용하는 유용한 방법입니다.