
Webhooks in Zapier
Overview
In this guide, you’ll be creating a Webhook event for a Team in Frame.io, and using it to send a payload into Zapier. In this scenario, Zapier acts as a mediator — it can “catch” the hook from Frame.io, and then use the data from that hook to interact with other systems.
In many cases, Frame.io’s Zapier Integration supports native “Triggers” that will fetch data from Frame.io without manual webhook management (e.g. when an Asset is created). In this guide, we’ll be focusing on a workflow that isn’t currently supported by a native Trigger by reacting when a new Project is created in Frame.io.
First, we’ll set up a webhook to fire a notification when a new Project is created on a Team in Frame.io. Then, we’ll use Frame.io’s Zapier app to catch the notification, and relay some information about the Project to a Google Sheet.
This guide involves a degree of bouncing back and forth between Frame.io and Zapier. For best results, we recommend opening the two apps side-by-side while following along.
Things you’ll need
Before you start, you’ll need three things:
- Frame.io account access (so you can create a Token)
- Team Manager or Admin access to a Team in Frame.io (so you can create a Webhook)
- A Zapier account.
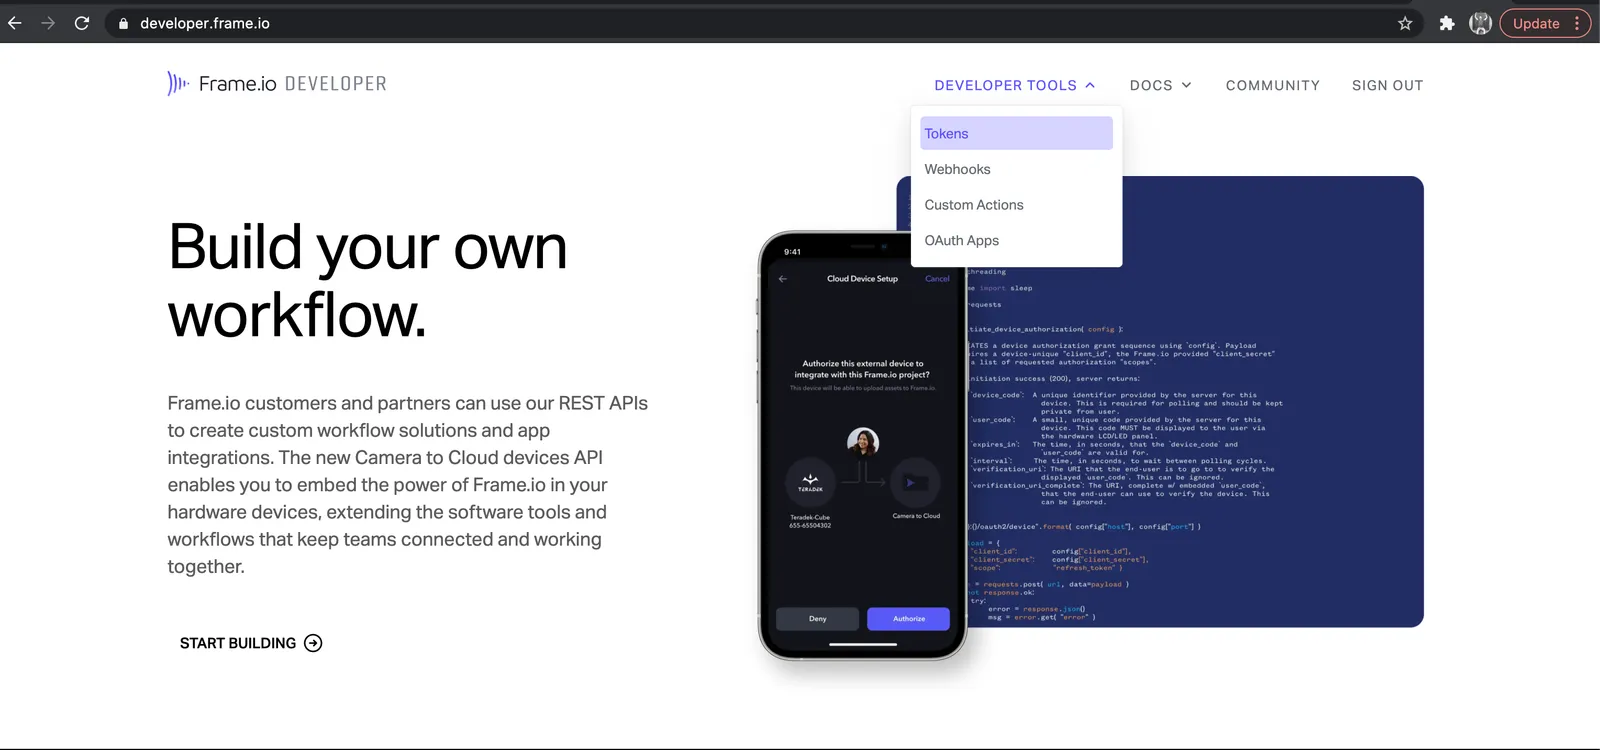
To verify the first two, head over to developer.frame.io and sign in. If you don’t see the “Tokens” and “Webhooks” menu items (shown below), please reach out to your Frame.io account representative.
Step 1: Create an API token
In order to complete this guide, you’ll need an API token whose scope matches the scope of the Webhook we’ll be sending. If you already have a token connected to Zapier that includes the below scope, you can just use that. If not:
Give your new Token a descriptive name, and select the following scope:
- Projects: Read
Step 2: Create a Webhook in Zapier
In Zapier: Choose the “Webhooks by Zapier” trigger app, and select “Catch Hook” as your desired trigger action.
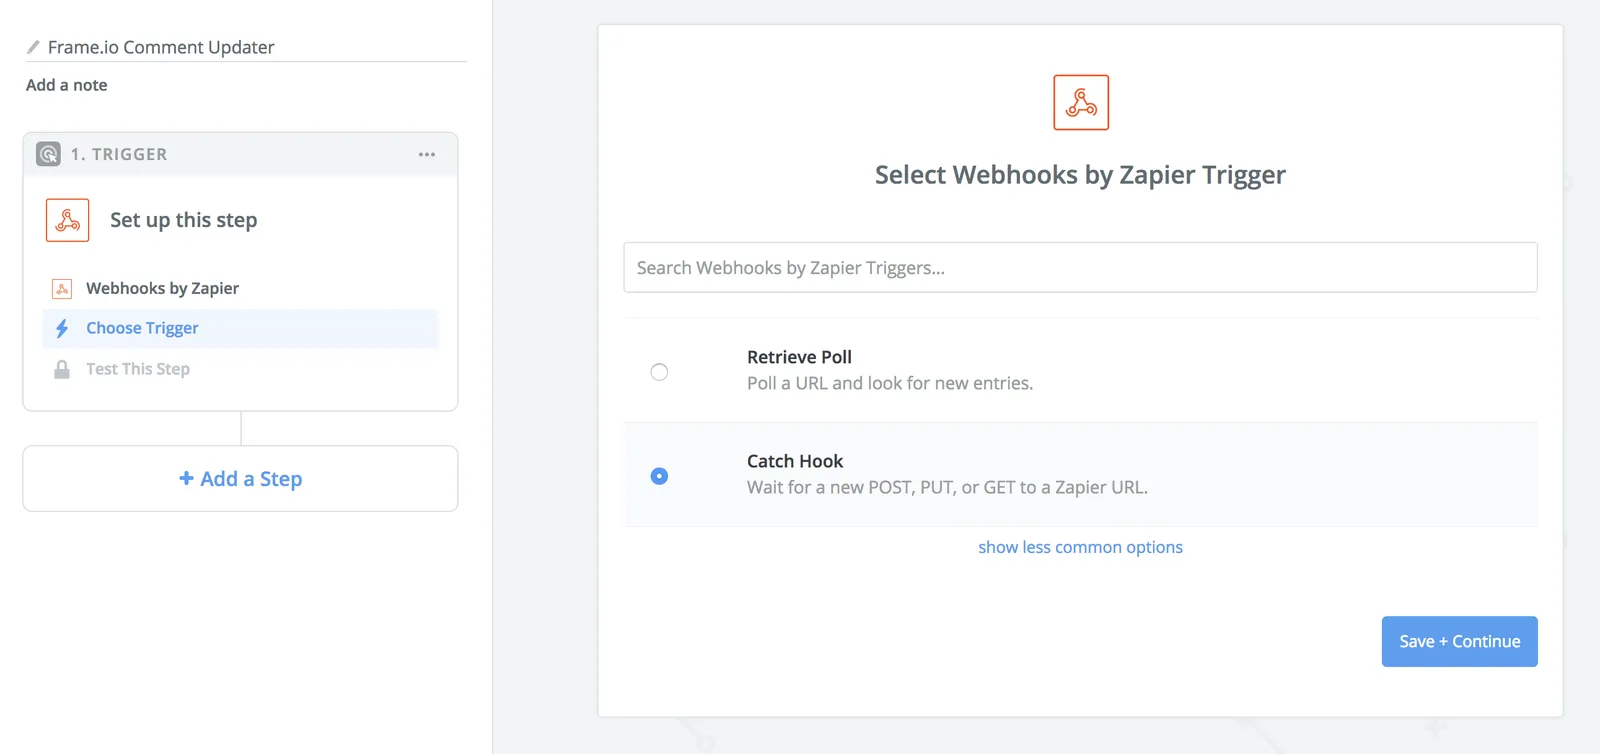
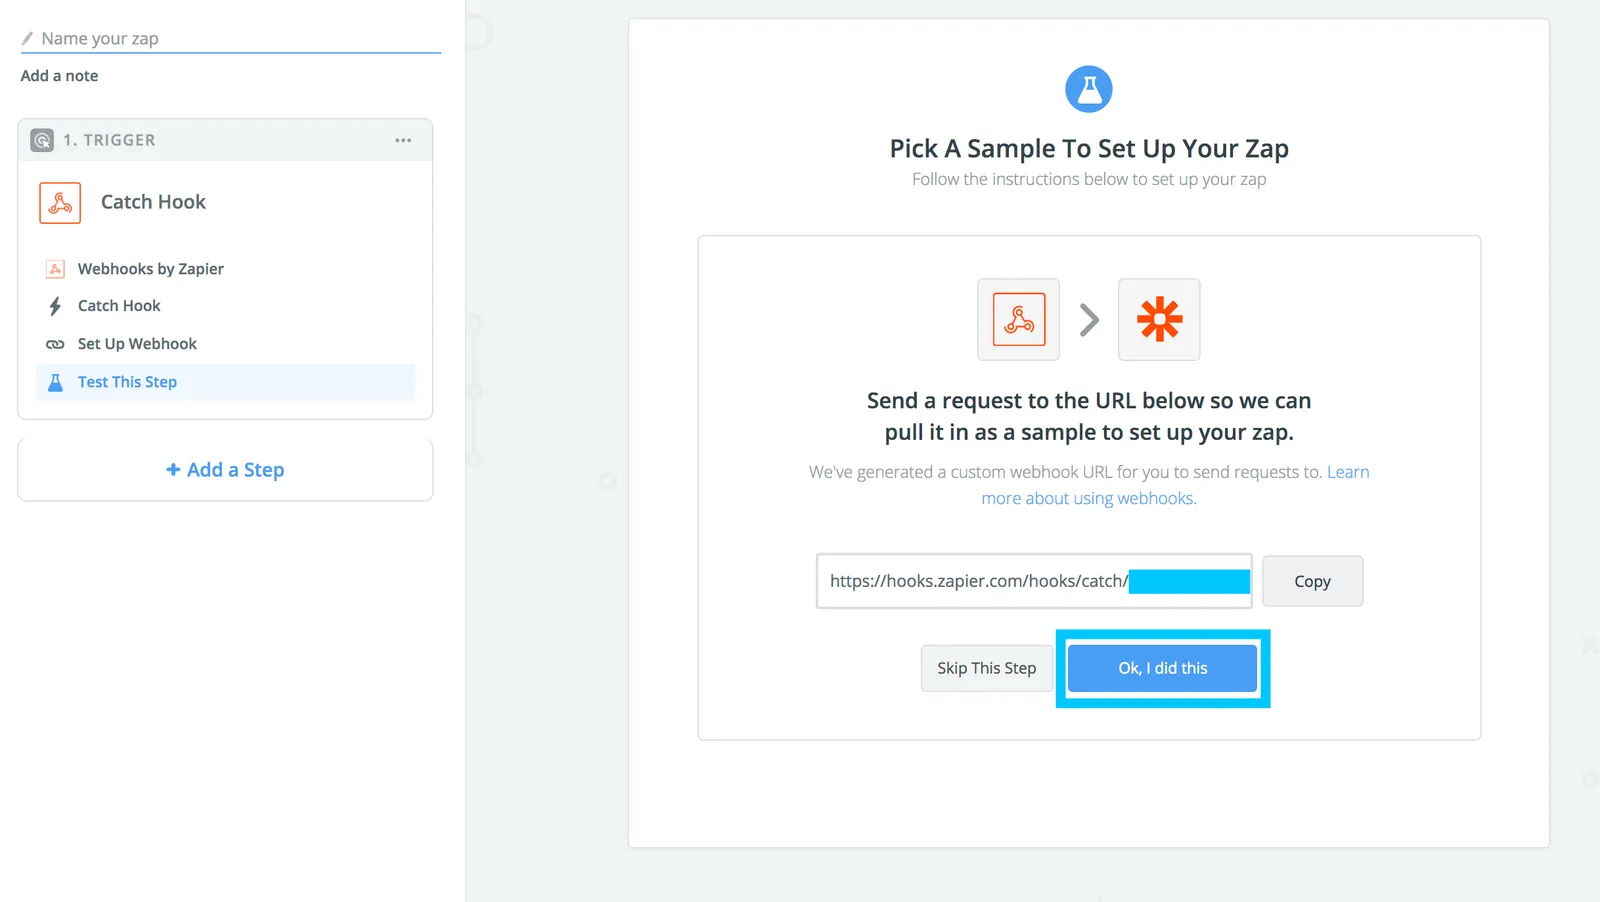
After saving, skip the next optional step, and you should see a screen with a URL starting with https://hooks.zapier.com/...
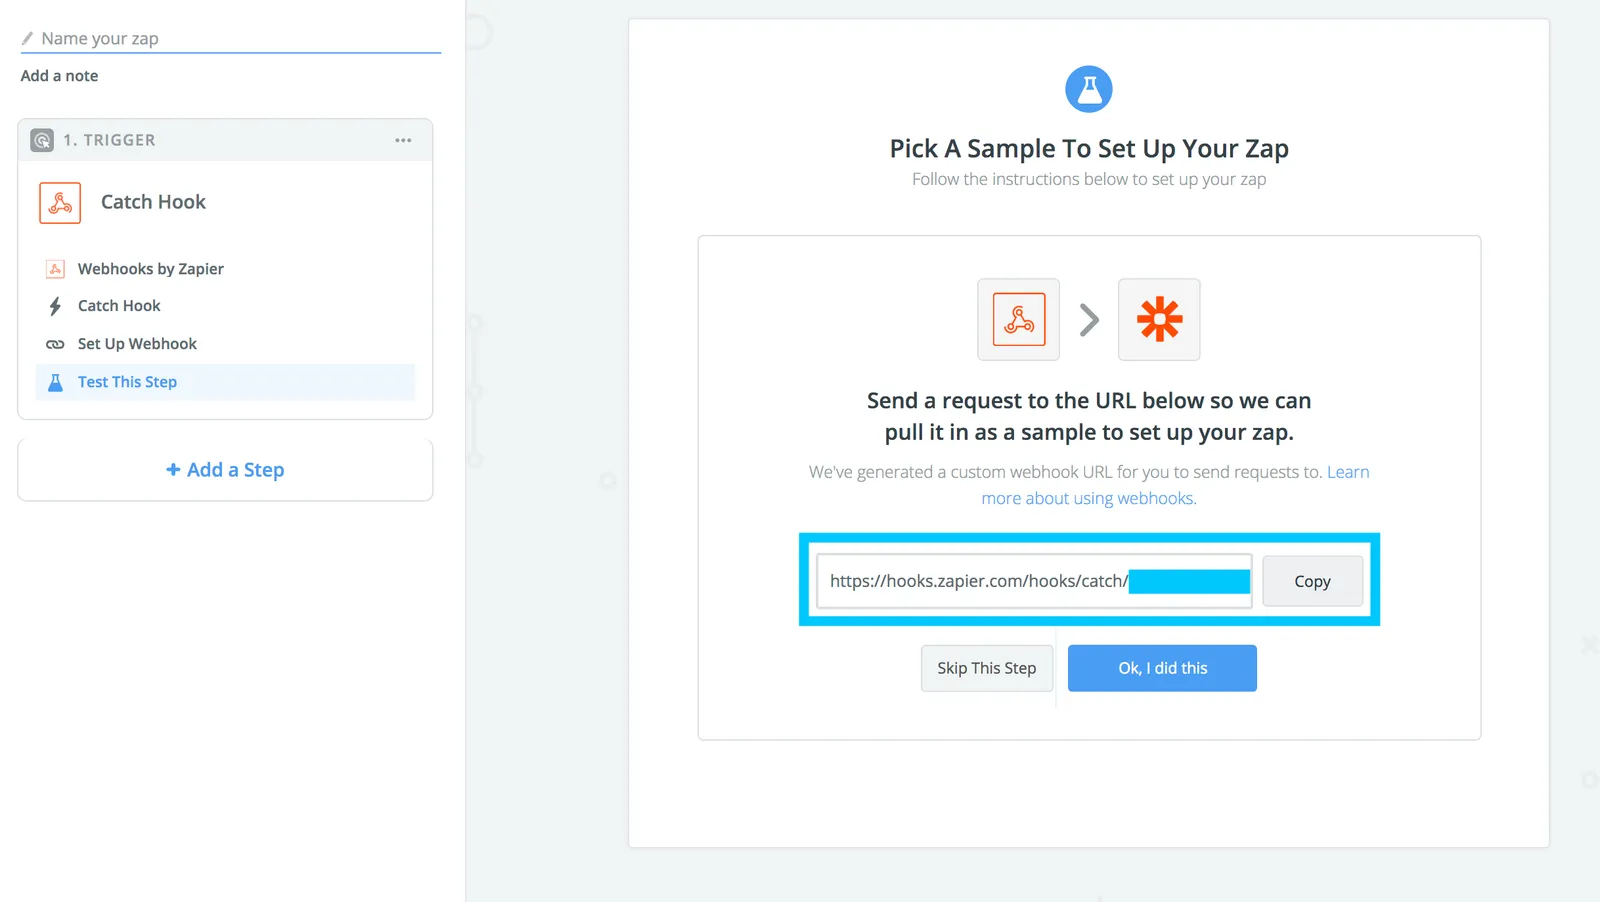
From this screen:
- Copy this URL
- Leave Zapier open
- Head on back to Frame.io Developer in a separate tab or window.
Step 3: Set up the Webhook event in Frame.io
Back in Frame.io Developer: head over to Webhooks, and create a new Webhook with:
- A descriptive name.
- The URL that you copied in the previous step.
- The Team on which you’d like this hook to work.
- The Frame.io event you’d like to associate with the hook (for this guide: Projects -> Created).
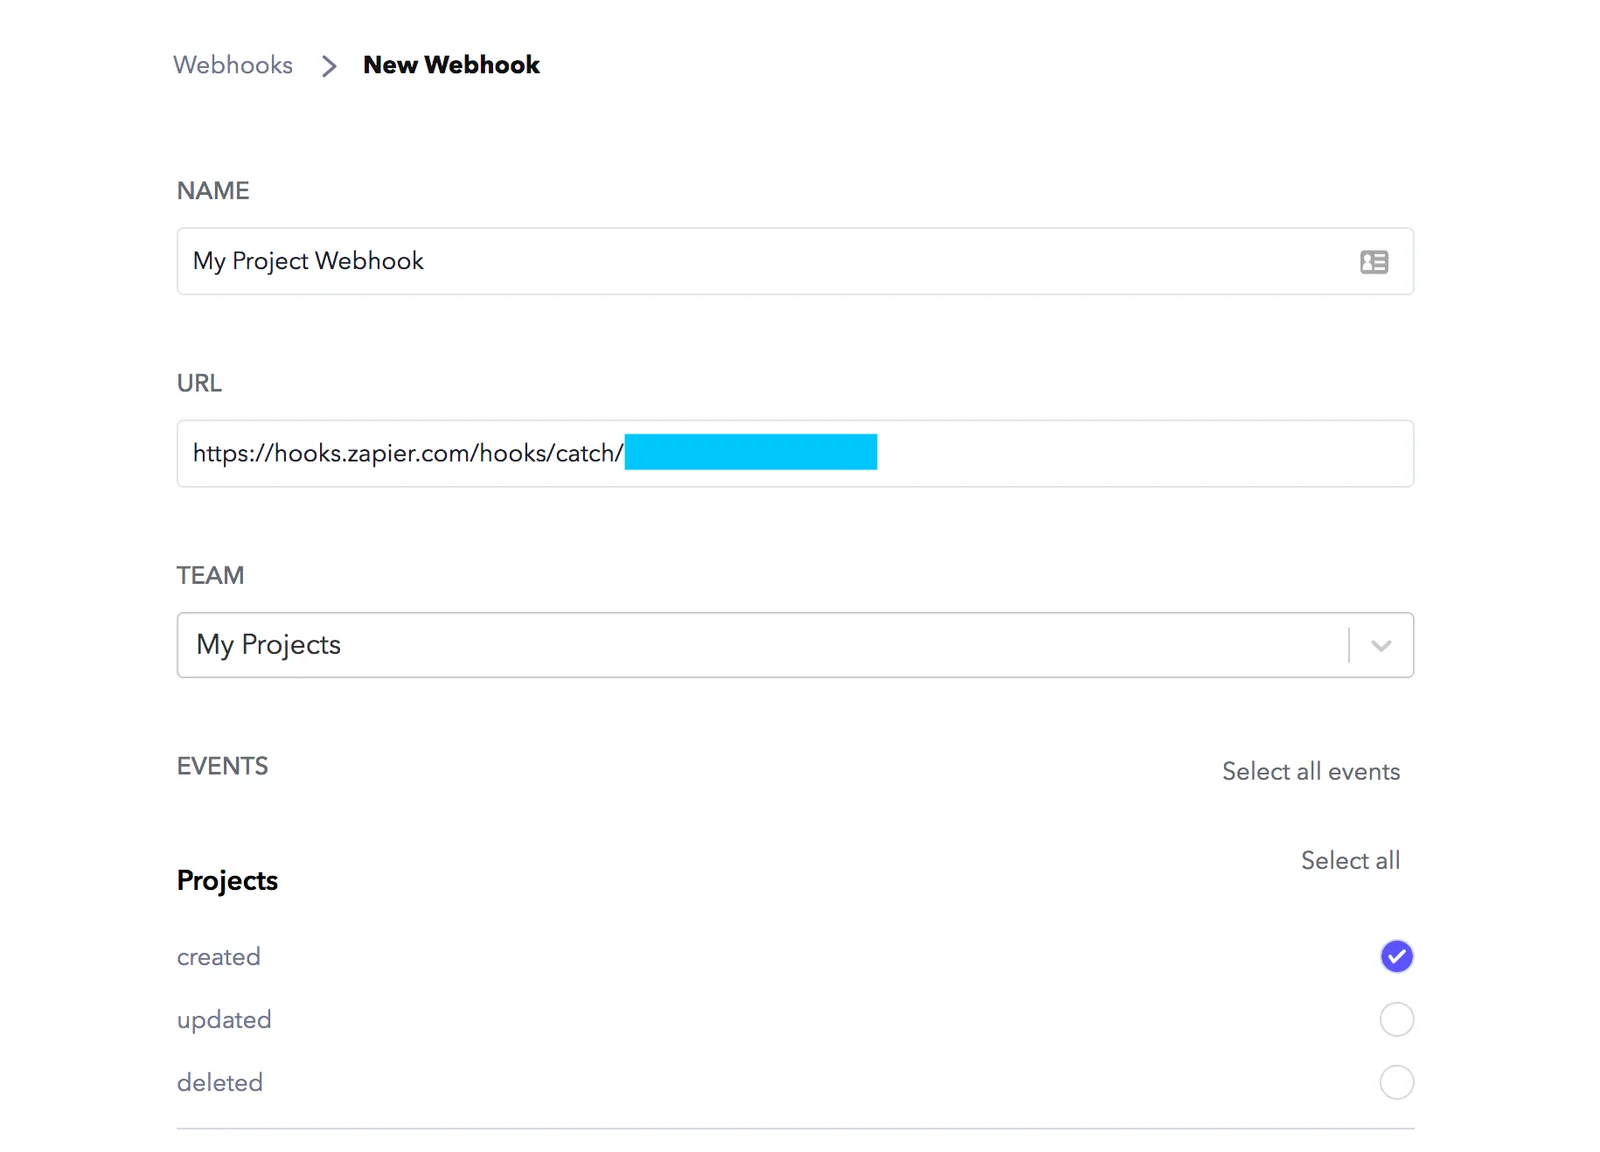
Save your new Webhook with the Create button, and head back to Zapier.
Step 4: Send a test hook
To recap, we now have:
- A Webhook configuration in Frame.io that will fire when you create a Project in a specific Team.
- A Webhook trigger in Zapier that is expecting a new Project from Frame.io.
Now we’ll actually send our data to Zapier by creating a Project.
a) In Zapier: prepare to catch the Webhook
In the screen you still have from Step 2, go ahead and click “Ok, I did this.” This will prepare Zapier to catch an event on the specified URL.
b) In Frame.io: Create a new Project
On the configured Team, make a new Project — give it any settings you’d like.
This will cause a Webhook to be sent out, which will then be caught by Zapier. In response you should see an acknowledgement of a new hook in Zapier, and if you expand it, you should see the full Webhook payload from Frame.io.
Congrats! Hit Continue, and give yourself a gentle high-five. Now the hard part’s done, and we can use our Webhook to do things!
Step 5: Get your Project
a) Add the Frame.io action
Click ”+ Add a Step,” and search for Frame.io. Once you’ve selected the Frame.io app, pick the Find Project action. Now click “Save + Continue.”
b) Connect your Frame.io account
On the next screen, click “Connect an Account,” and on the subsequent popup, enter your Frame.io API Token (which you generated in Step 1). If you’ve forgotten or lost your token between then and now, don’t worry — just make a new one in your Account Settings, ensuring you choose the “Project: Read” scope. Click “Continue.”
c) Fetch your Project
In the next screen, click on the arrow to the far right of the Project field at the bottom of the list, and select Use a Custom Value.
Then, in the new “Custom Value for Comment ID” field that appears, click the icon on the right, and choose the Resource ID from the ensuing dropdown.
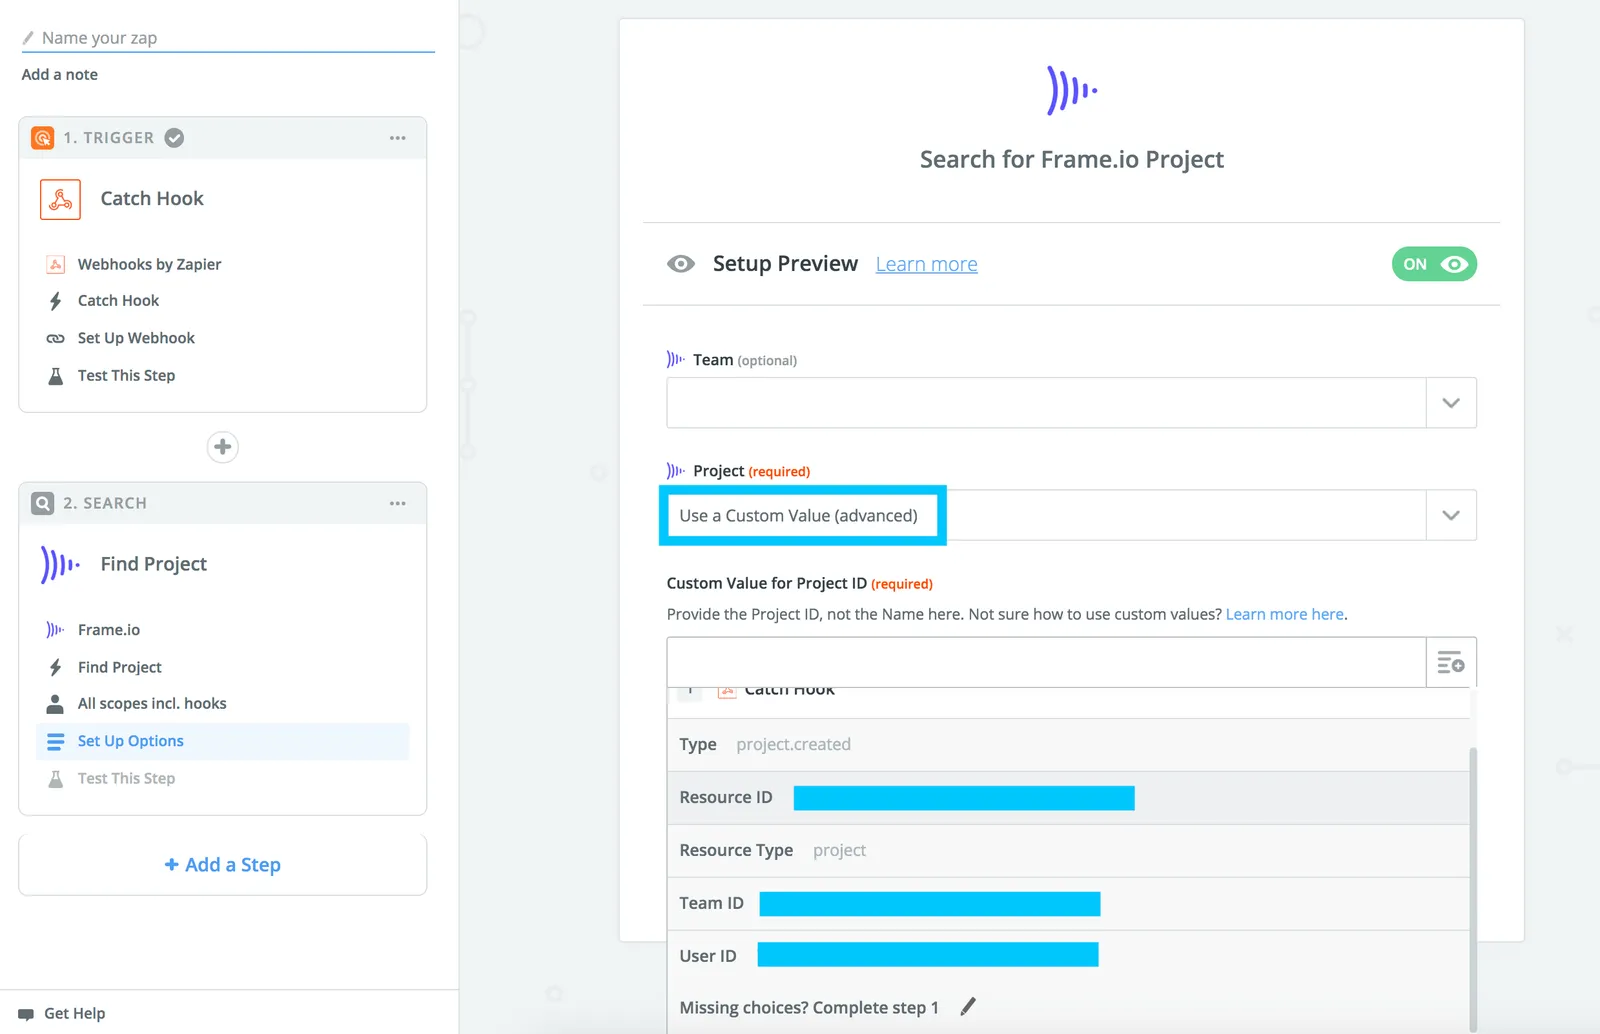
To ensure you’re always working with fresh data on every event, you should always follow this pattern of Custom Value + Resource ID when setting up webhooks between Frame.io and Zapier. This applies to natively supported Triggers, too!
Now click “Continue.” Once Zapier verifies that it has the Project ID on the next screen, click “Fetch + Continue,” and once the fetch is complete, you should see a screen like the below:
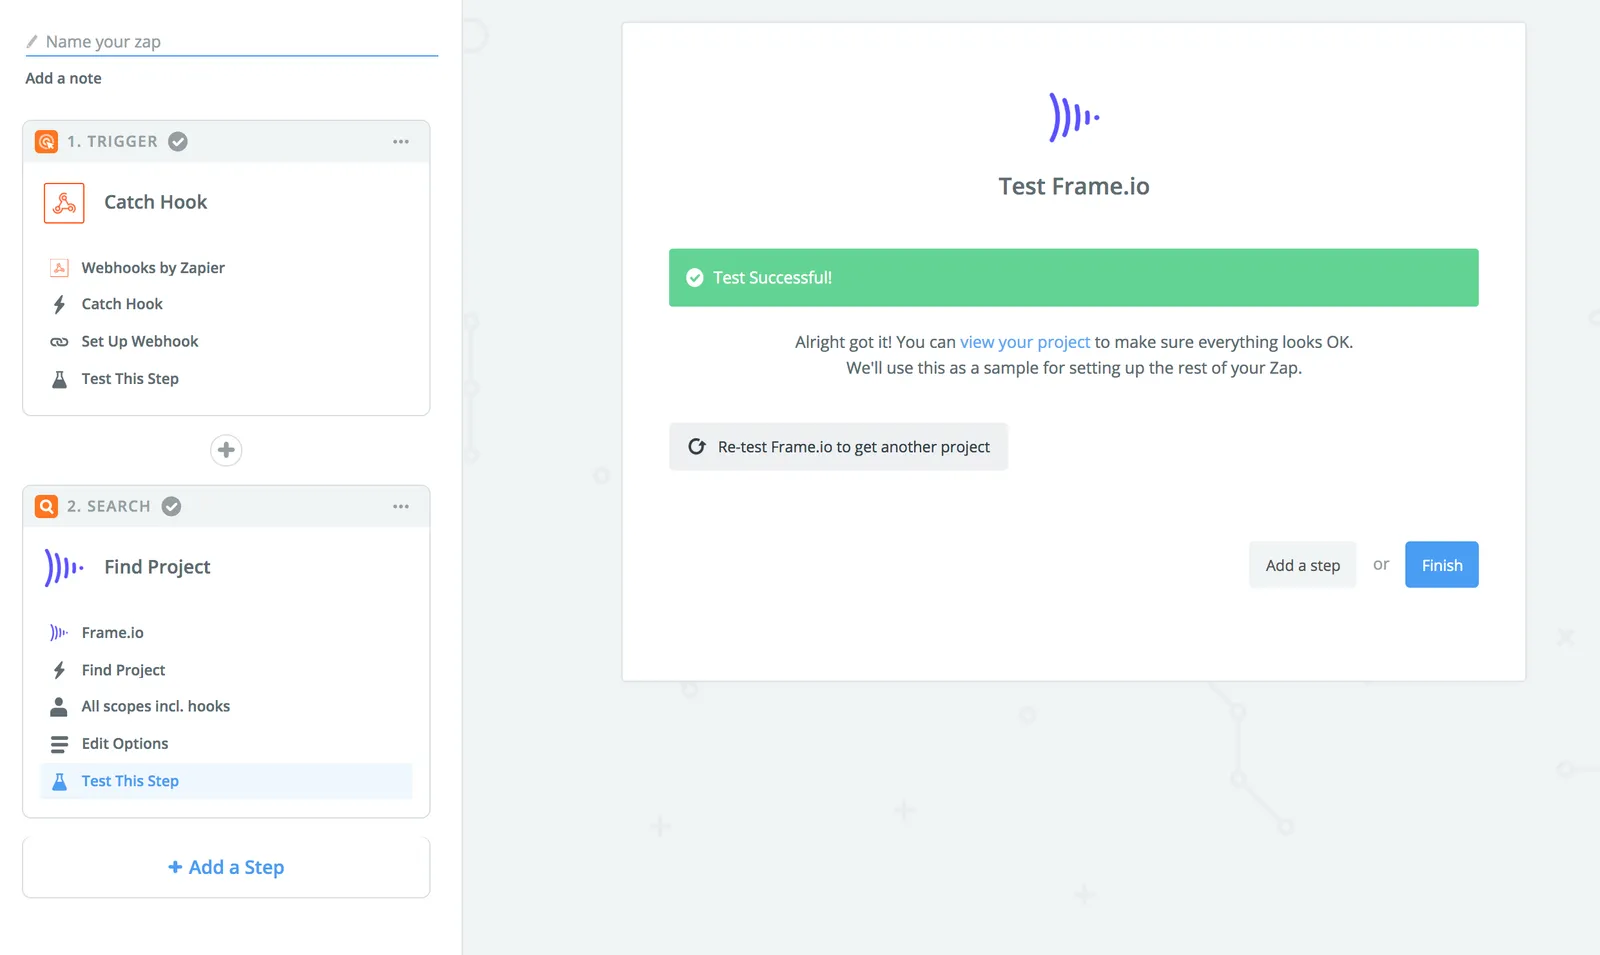
Excellent work! Now you have all the information about your new Project in Zapier, and you can relay it to any number of different systems, including:
- Google Sheets
- Airtable
- Asana
- Trello
- Jira …and nearly 3,000 more.
Once you’ve built out the rest of your Zap, simply turn it “On,” and that’s it!